Adobe’s Lightroom is nearing its tenth year and for many it is the software of choice for editing and managing images, as such it needs little introduction.
If you are new to Lightroom it can be daunting, with many options and a seemingly endless supply of effects that can be created on an image.
Presets are automatic ‘recipes’ that can be created in the program to allow combinations of effects to be added not just to one image but to multiple images, creating a particular look for a project.
A search for Lightroom Presets will reveal hundreds of sites offering thousands of presets for free.
I’ve never been a heavy user of presets, save for a limited selection of my own but when the opportunity came up to test the latest landscape presets by Sleeklens I was more than interested to try them out.
Installation
Downloads come in the form of a zip file, in my case called Sleeklens – Through The Woods Workflow. After unzipping there are two folders, one containing brushes and one containing presets.
The difference between brushes and presets will become apparent when you install them and use Lightroom but the simple difference is that using brushes will allow you to edit small areas of an image, for instance adding an effect to the sky or the foreground whereas a preset will apply to the whole image.
Helpfully Sleeklens include two pdfs, one with a video guide on YouTube to show you how to install presets and the other a step-by-step on how to install brushes.
Installation is easy, to install presets first open Lightroom then go to Edit in your top menu, choose Preferences then Presets where there is an option to Show Lightroom Presets Folder… this opens the folder where your Adobe preferences reside.
Double click on Lightroom then Develop Presets and drag in the folder Through The Woods presets from your unzipped download.
Close Lightroom and proceed to install your Sleeklens brushes.
Open C:\Users\<Username>\AppData\Roaming\Adobe\Lightroom and look for Local Adjustment Presets. Move the .lrtemplate files from your download folder to the Local Adjustment Presets folder.
Now it is time to start Lightroom and use the Sleeklens presets and brushes.
Sleeklens Presets in Use
In use the Sleeklens presets are different to most other preset providers, designed to be part of a workflow the presets are divided into sections that can be applied one after the other. Brushes meanwhile allow for specific adjustments to the image.
The Sleeklens presets are divided into All-in-one, Base, Exposure, Colour & Colour Correct, Tone/Tint, Polish and Vignette.
All-in-one does what you might imagine, adjusting the whole image in one click but the real power of the Sleeklens workflow is in using the Base, Exposure, Colour & Colour Correct, Tone/Tint, Polish and Vignette one after the other. Helpfully each of these is preceded by a number so you know which stage of preset each is.
With other presets, especially free ones very often the effect can be good but the process involved is a mystery. That’s not a great way to learn and to adapt the power of presets to different images.
Another pdf included in the download folder contains multiple images with a list of presets showing base images, edited images and a list of presets and brushes applied.
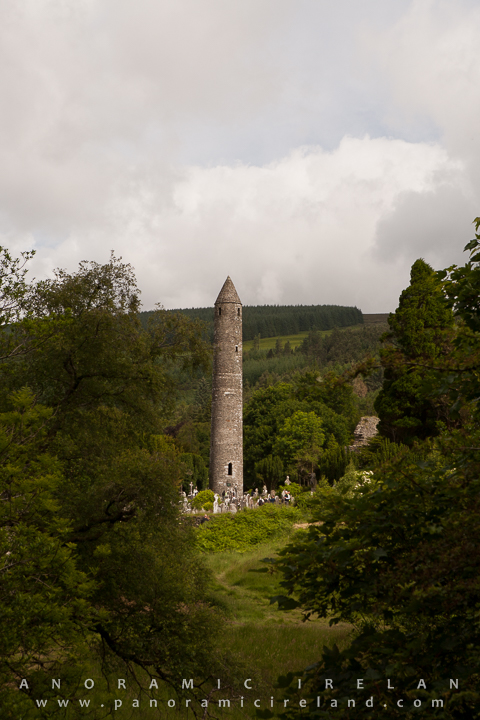
Here is an image of Glendalough round tower and monastery in Ireland’s County Wicklow. This is a place that I visit often, the tower is over 1,000 years old and sits in a valley of two lakes. This is the first image that I used the Sleeklens presets on.
The above image is unedited, straight from the camera via Lightroom with no adjustments, original settings were 1/125s at f/11 on a Canon 24-70mm at f/11.
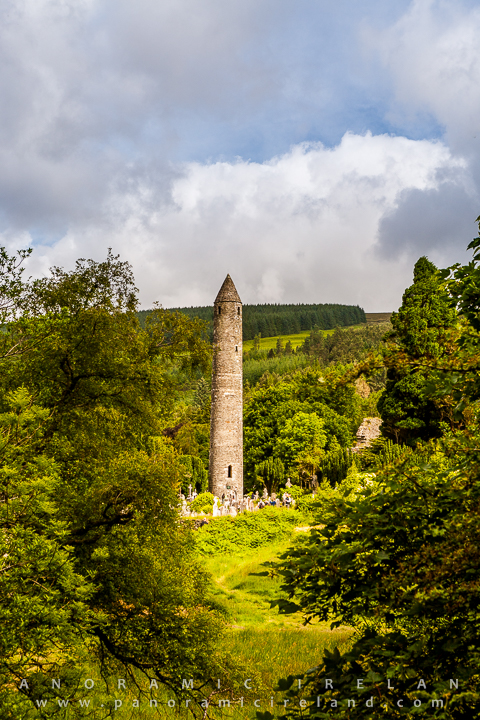
To keep it simple, I wanted to see what could be achieved quickly with the Sleeklens presets so I went with:
- Preset: Through the Woods | 1-Base – Exdenting DR
- Preset: Through the Woods | 2-Exposure – Darken Shadows
- Preset: Through the Woods | 3-Colour – Deep Blue Skies
The resulting image looked like this:
The Sleeklens Through the Woods workflow is available here and their other workflows tailored for fashion, architecture etc. are available here.
This is just one of the many options available in the Through the Woods workflow, I will continue to use the presets and brushes so expect to see more posts soon where I will edit the images with a more thorough workflow including the use of brushes.


Leave a reply